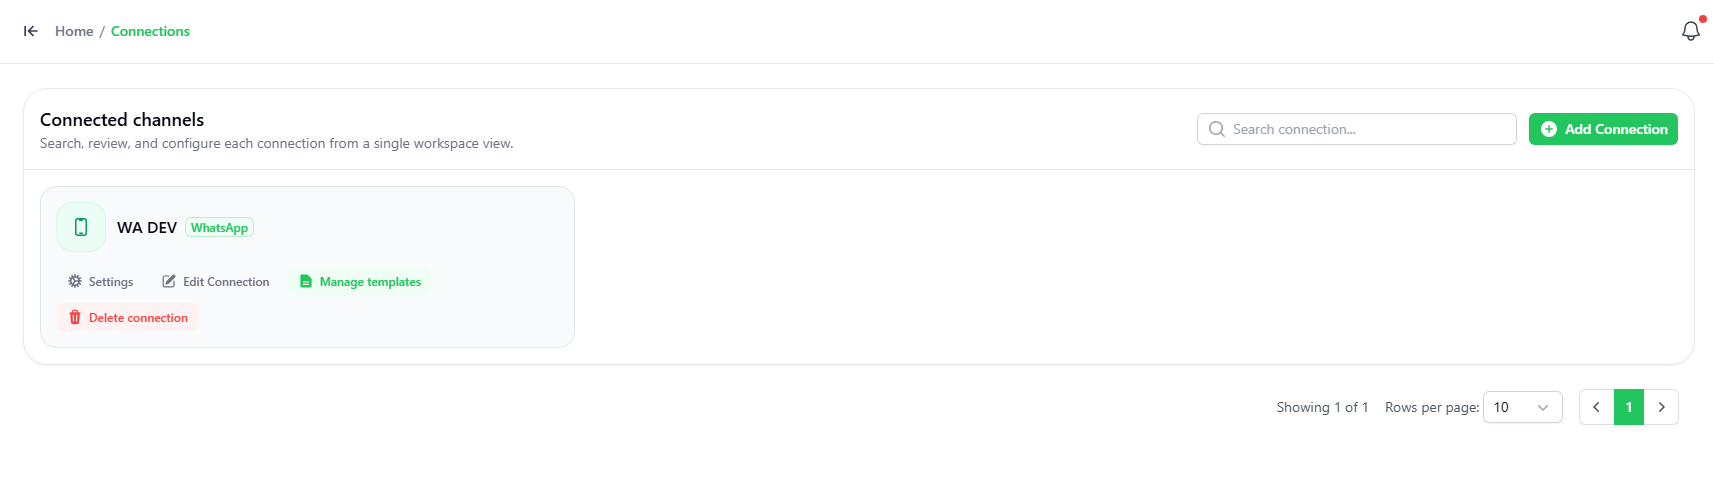
6. Connections
This function is to link the web application to one or more WhatsApp accounts. The platform is designed to work with both WhatsApp Web as well as WhatsApp Business APIs. Please contact us should you need more information on the different systems available in the WhatsApp ecosystem.
Official Connection
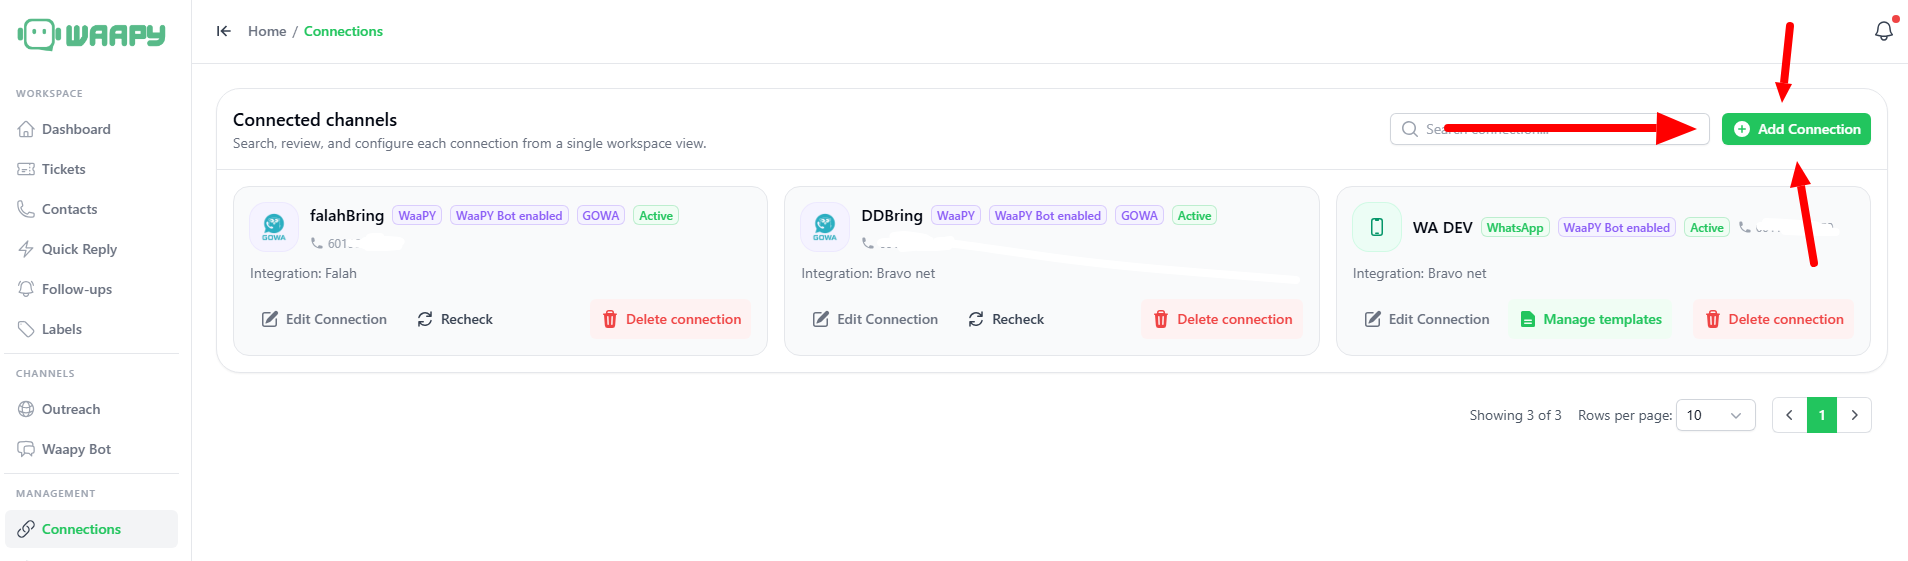
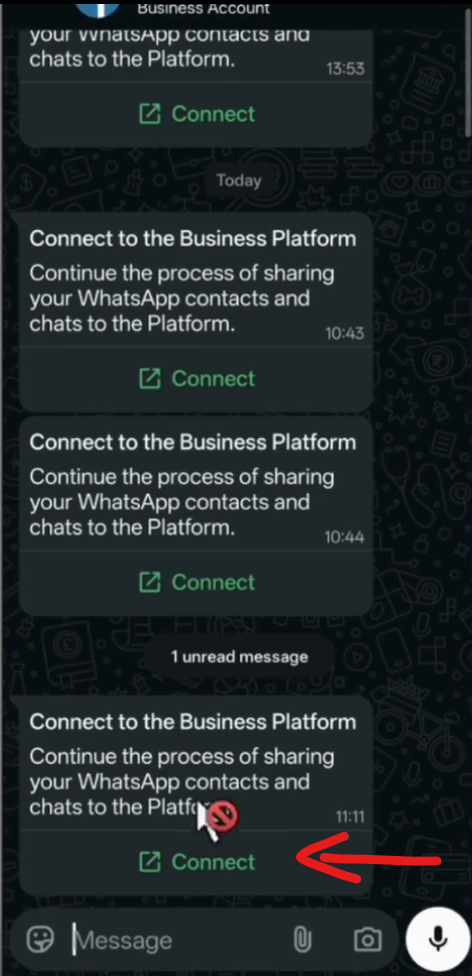
- To add a connection, click the “ADD Connection” button on the top right-hand corner.
- Choose if you want a manual WhatsApp connection, or META Official Connection.
If the chosen connection is the manual Meta Connection, You can see follow the video given on the screen here, starting from min 1:12:
Step 1: Open Waapy
Go to:
Connection→ Add Connection
Select WhatsApp

Step 2: Click automatically connect
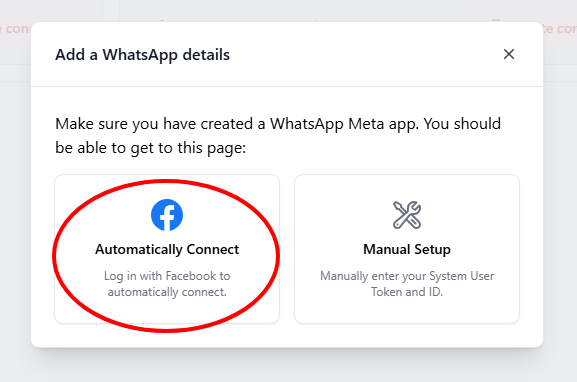
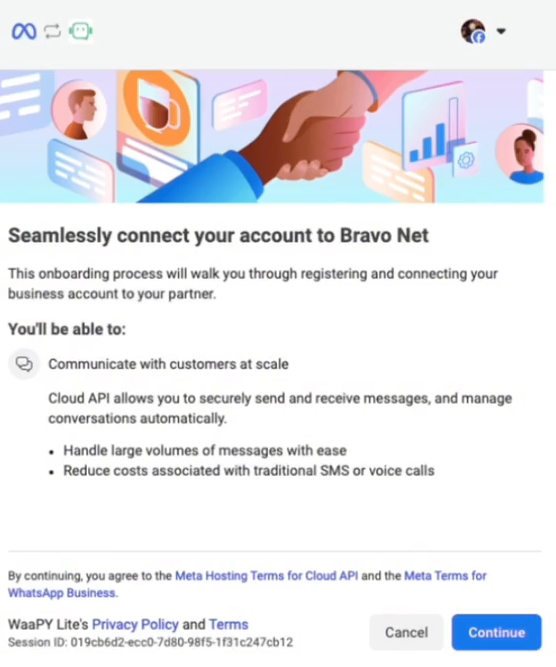
Step 3: Click continue
Your Business will popup here. Click continue
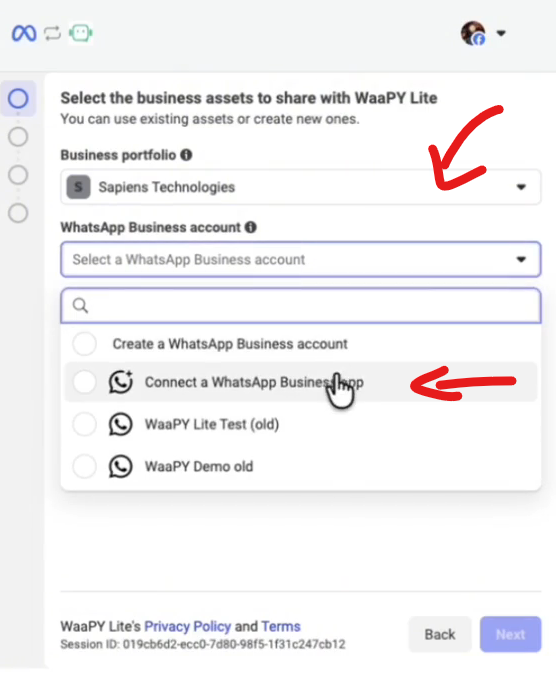
Step 4: WhatsApp Connection
- Select your business on Business Portfolio
- Click on WhatsApp Business Account
- Click Connect a WhatsApp Business App

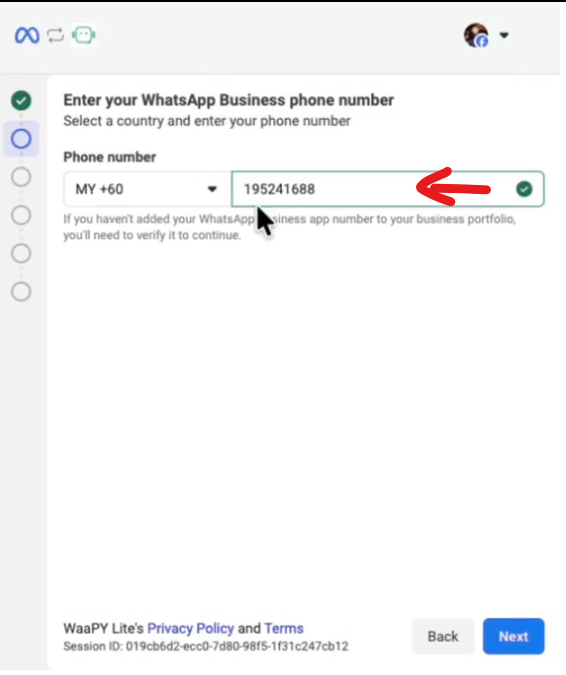
Step 5: Phone Number
- Key in your business phone number
- Click Next, and a QR Should appear

Step 6: Go to WhatsApp Business app
- Click The Facebook Business Chat
- Click Connect
- Scan the QR code
- Click Select ALL Chats

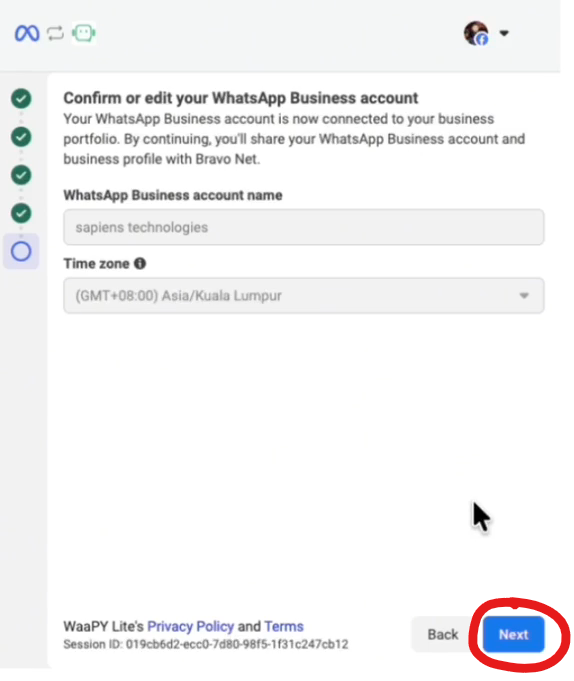
Step 7: Reconfirm your business details
- Check your business details and time, Click NEXT
- Check your business info, etc, Click NEXT
- Click NEXT until you are successfully Connected

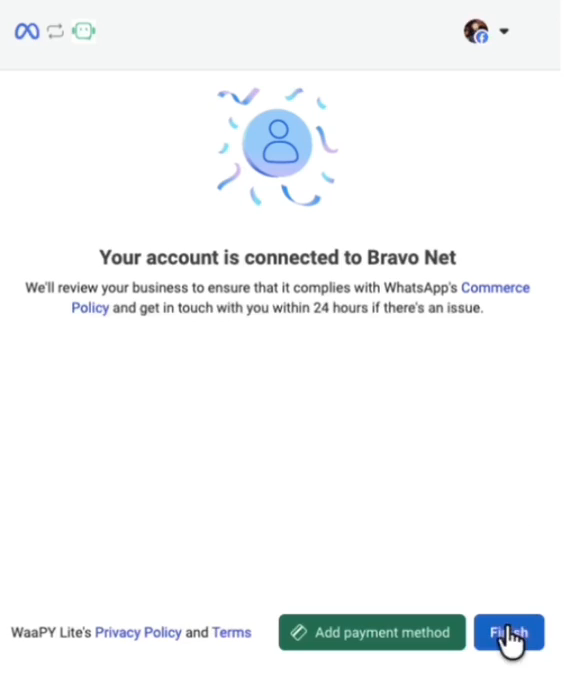
Step 8: Add Payment Method/Finish
- You can either add on payment method for your official connection
- If you have added the payment method, just click on finish
- Wait until WaaPY Page refresh itself
Unofficial Connection
Please refer to this video tutorial:
Step 1: Open Waapy
Go to:
Connection→ Add Connection

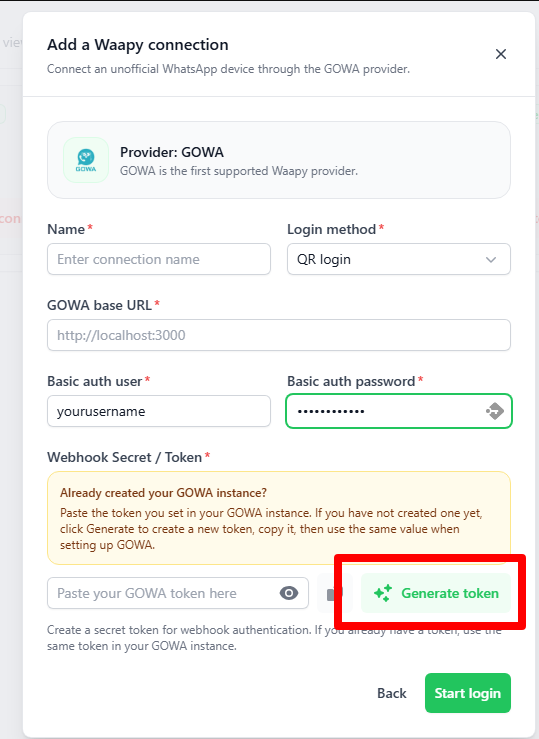
Select Waapy/GOWA

Step 2: Generate Token
- Fill in the Connection Name
- Login method, QR Login
- Leave GOWA Base URL empty for now
- For basic auth user, these are the credentials for GOWA, you can enter in your email/username, and password. keep this somewhere safe
- Click Generate Token.
- Copy the generated token somewhere safe.
- You will need this later.
- Leave it as it is, Dont click Start login FOR NOW

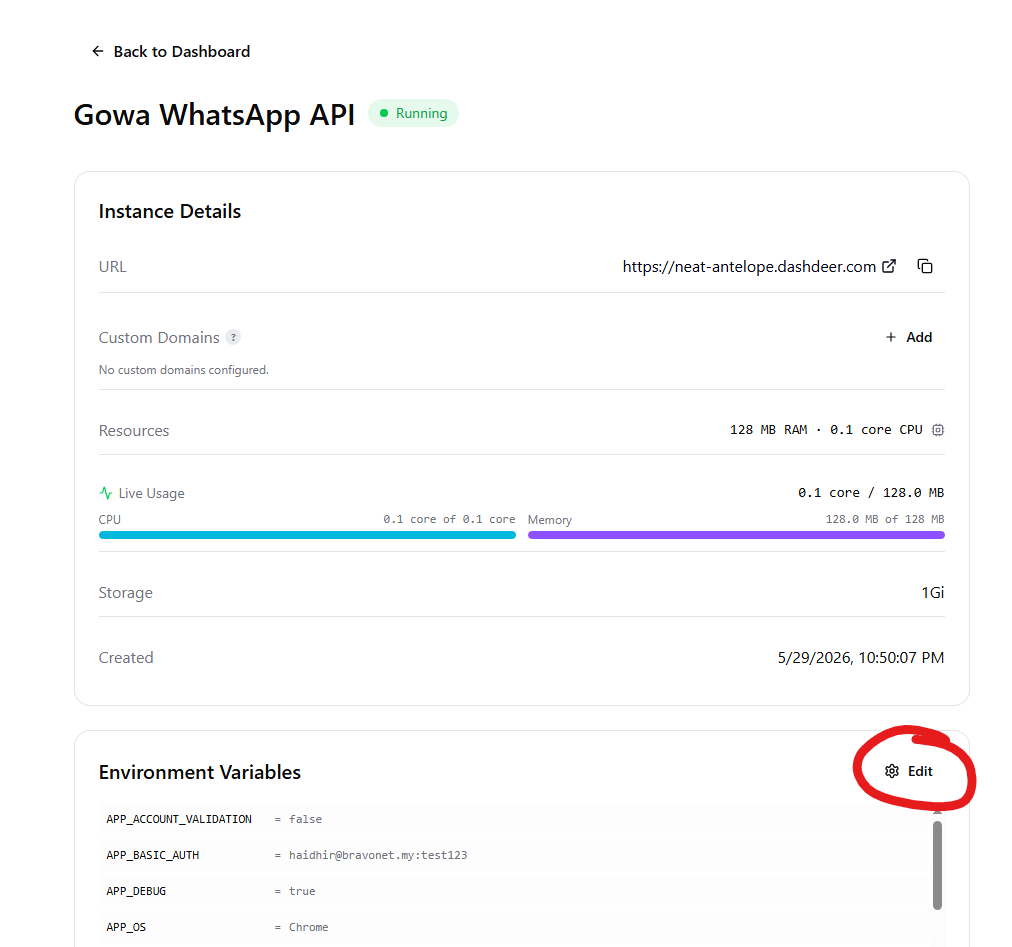
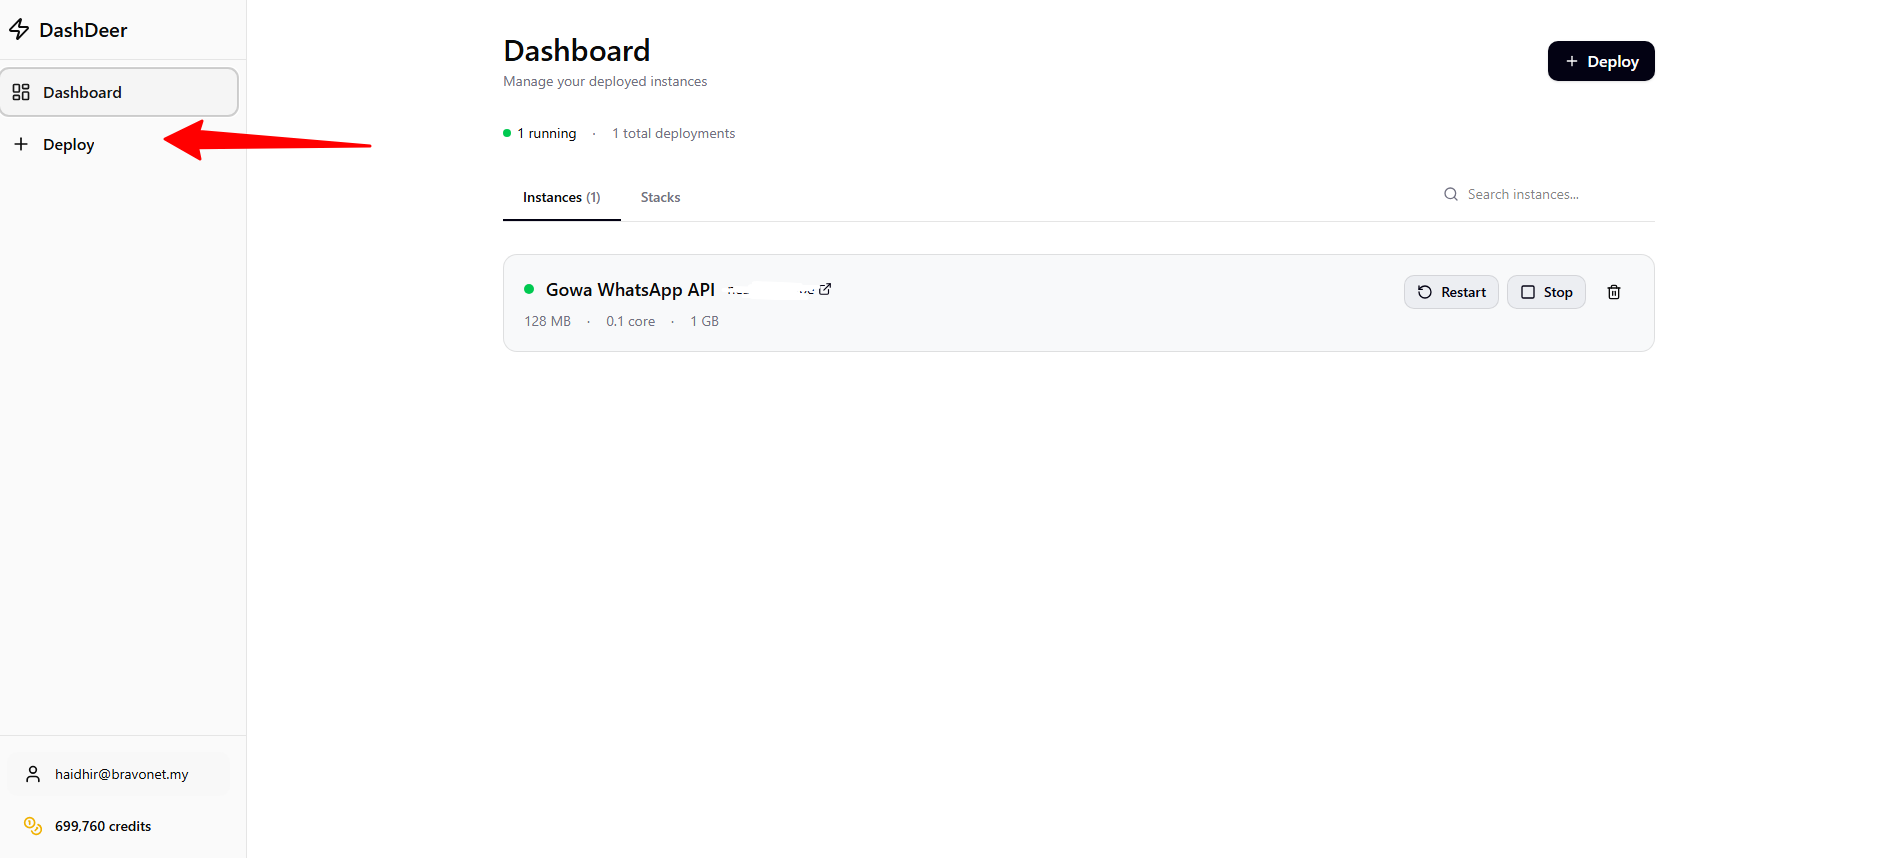
Step 3: Open Dashdeer
- Login to DashDeer
- Click Deploy

- Scroll Down until u see GOWA Whatsapp API and Click it

- This configuration menu will popup
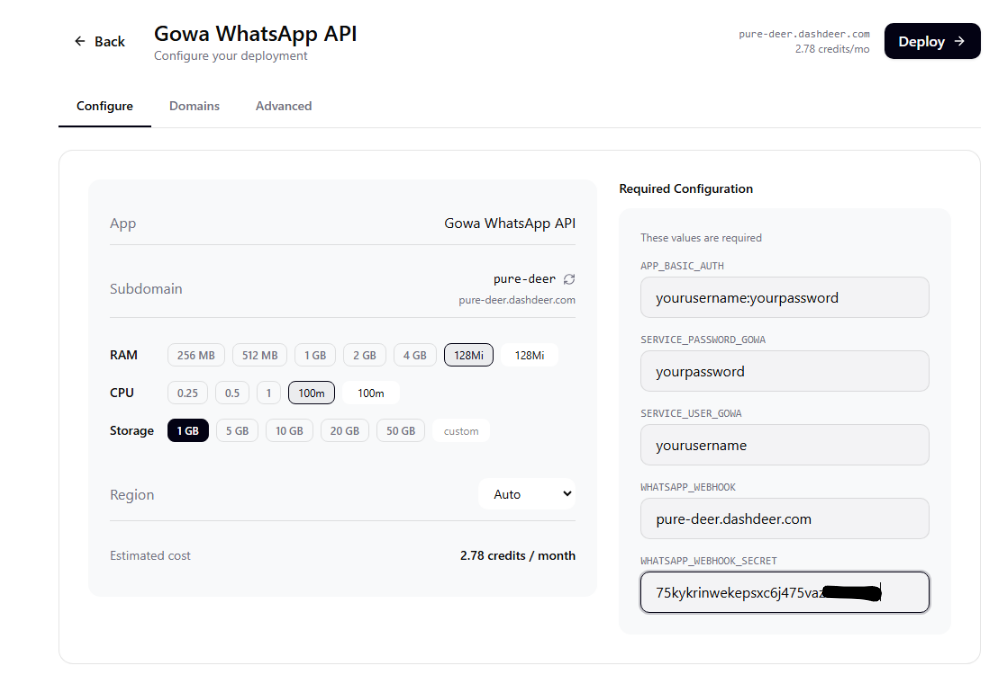


Step 4: Fill Environment Variables
1. APP_BASIC_AUTH
Create your own username and password. Follow the exact format, you need " : " in between your username and password for APP_BASIC_AUTH
Example:
yourusername:yourpassword
2. SERVICE_USER_GOWA
Use the same username.
Example: yourusername
3. SERVICE_PASSWORD_GOWA\
Use the same password.
Example: yourpassword
4. WHATSAPP_WEBHOOK
Take the SUBDOMAIN Provided here first, DO not leave this empty for now, we will edit this later

5. WHATSAPP_WEBHOOK_SECRET
Paste the token generated from Waapy. See Step 2 for more info
Example: 75kykrinwekepsxc6j475vazasosdsdw
Step 5: Deploy
Click Deploy.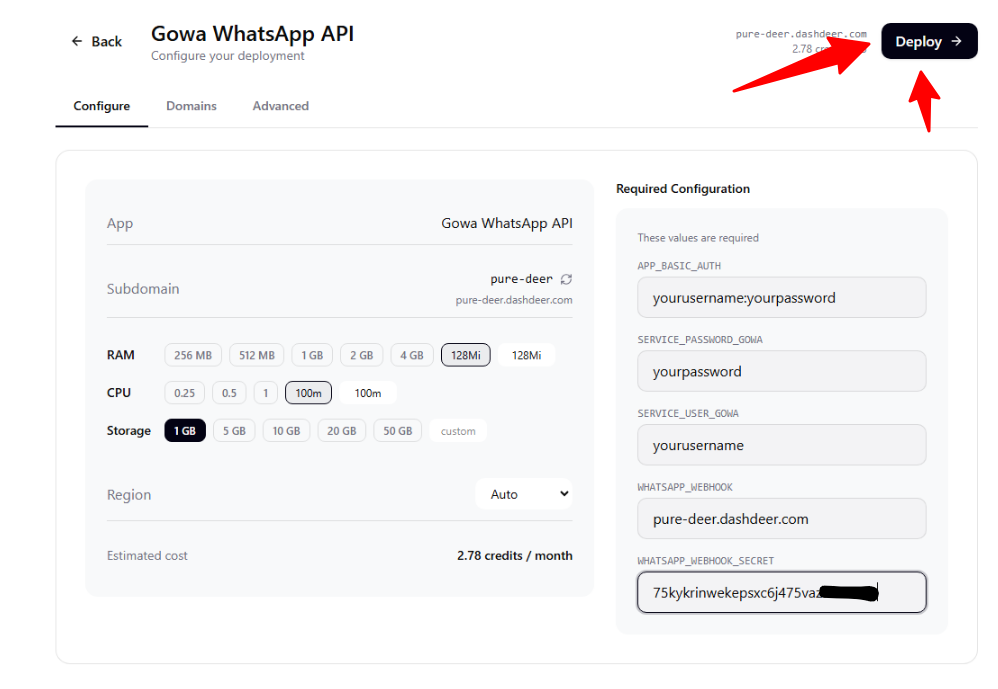
- Wait until the deployment is running. Hit refresh once it has hit around 30 seconds if it still hasnt say "Running".
- COPY the URL by clicking the small button
- KEEP this page OPEN


Step 6: Return to Waapy
- Paste in your URL you have deployed at GOWA Base URL
- After that click Start Login
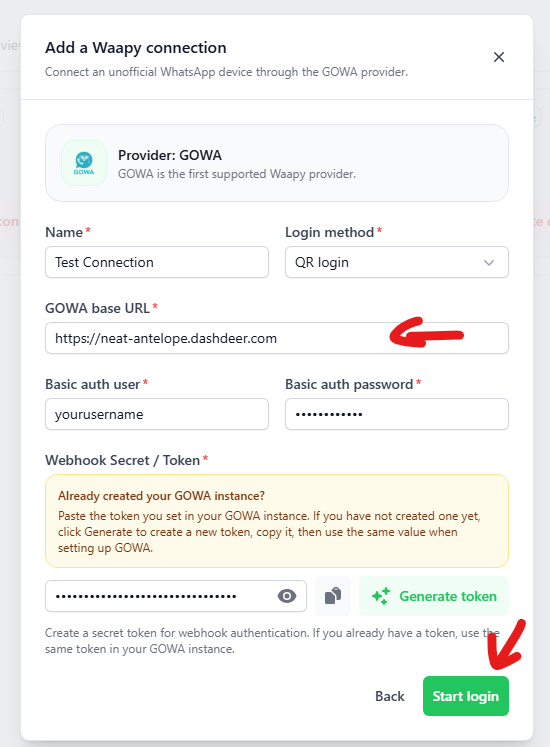
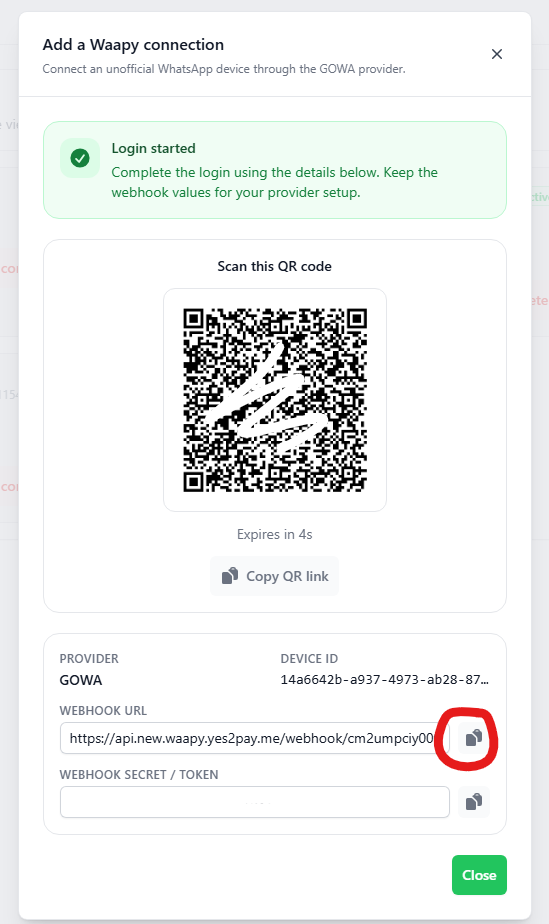
Step 6: QR Login
- A QR Should pop for you to scan on WhatsApp, scan it.
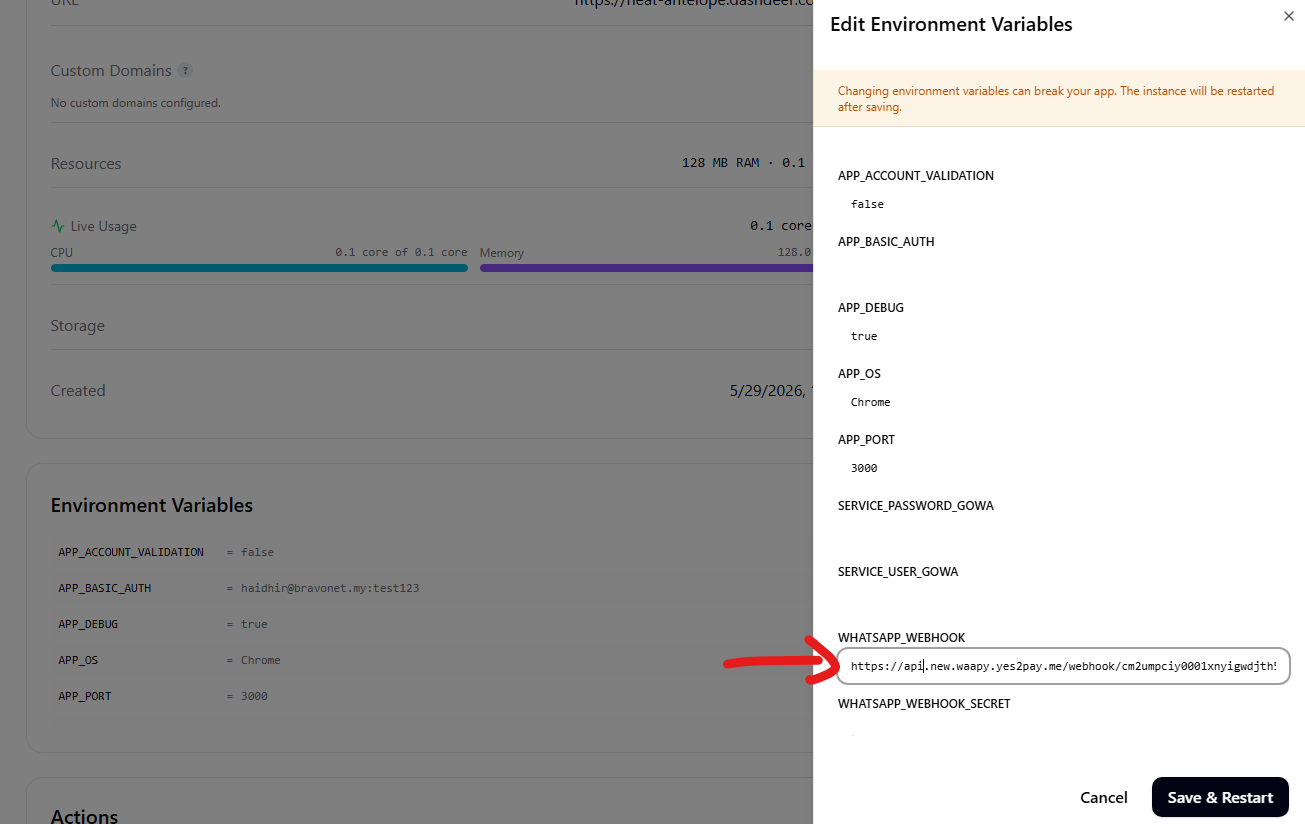
- COPY The WEBHOOK URL, Keep this copied, Open back your DashDeer (See Step 5)
Step 6: Go back to DashDeer
- Click the edit button
- Paste in your WEBHOOK URL Here
- After that Click Save and Restart