How to Add and Edit Article / Blog posts
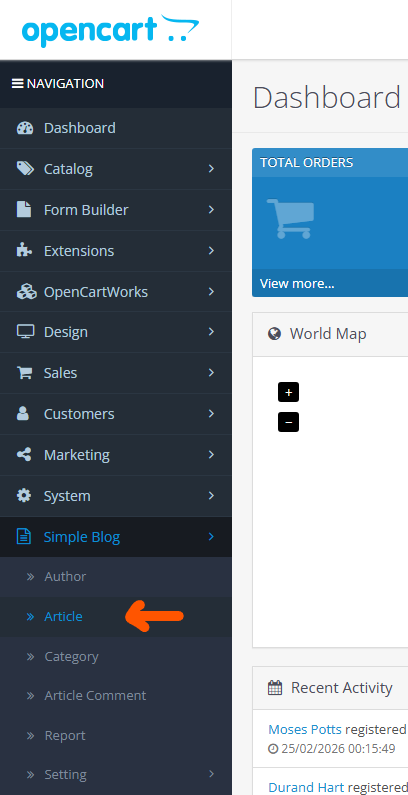
Access the Article Page
- Go to the Blog Post section from the admin panel.
- Navigate to the Article page.
- The Article page is located on the left-side panel under the Simple Blog menu.
- A list of existing articles will appear.
Add a new Blog post.
- In the top-right corner, click the “Insert” (+) button to create a new article.
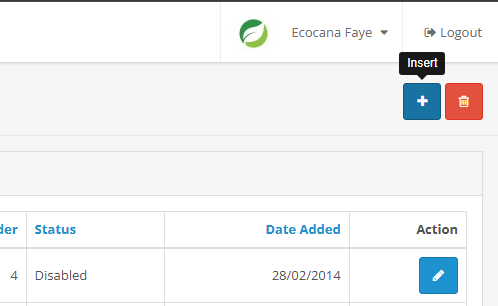
Edit or update Blog post.
- Click the pencil icon to edit or update a specific blog post.

Fill-in the Article or Blog content
- Under the General tab, fill in the following:
- Article Title.
- Description or the article content.
- Meta Description.
- Meta Keyword.
You can use the editor to insert content (WYSIWYG – What You See Is What You Get)
- Under Content tab, you will need to upload:
- Featured Image:- It will be displayed instead of the main article image in article page and articles listings.
- Main Image:- It will be displayed in recent articles.
Tip: Hover over the blue (?) icon to view tooltips.
- Under the Option tab, this is where you configure blog post settings:
- To allow comments
- Author name (this is required)
- Assign appropriate category
- Set store article? (leave unchecked by default if not needed)
- Sort order for display priorities (0 = highest priority, followed by 1, 2, 3, etc.)
- Set this blog post Status (Enable = Visible / Disabled = Hidden)
- Under the Related tab, this is where your article or blog post relates with other articles or blog posts.
- For Article Related Products:-
- Link the article to a product, category, or manufacturer as needed.
- Default setting is Product Wise.
- If you want to mention the specific product with this article. You might want to set the product under the Product section by searching the product name.
- If you want to relate this article with other articles you may do so by searching the article names under Related Article sections. FYI: Article name must be select on autocomplete.
- You may sort and set the status accordingly

- For Article Related Products:-
- Under the SEO tab, this is where we set the url’s end point for this unique article page. The tooltips mention: Do not use spaces, instead replace spaces with - and make sure the SEO URL is globally unique.
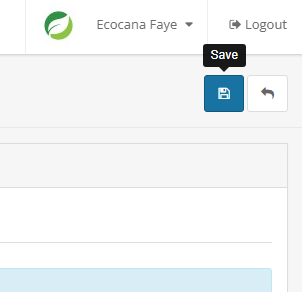
- Finally, you may click Save on the top right corner once you have checked and ensure everything is set accordingly.
- You may now refresh the page, and go to the Blog post page to see your latest changes.