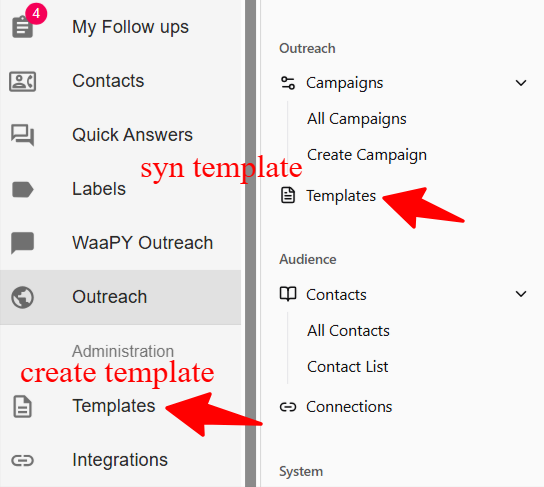
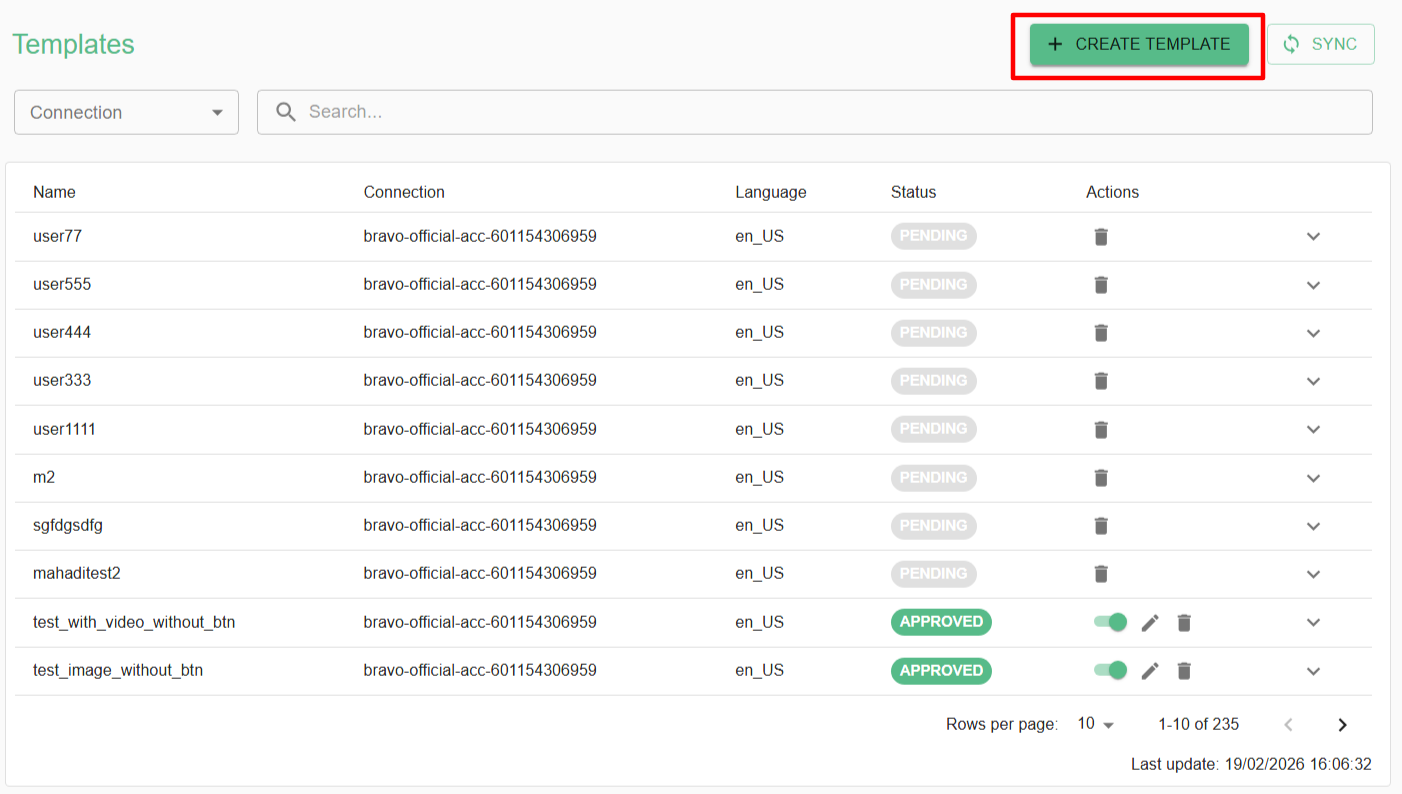
4. Templates
Step 1 :
-Create a templateonin Templates page
Step 2 : Basic Information
- Name the template you want to create
Template's Name must be lowercase, start with letter, and contain only letters, numbers, and underscores
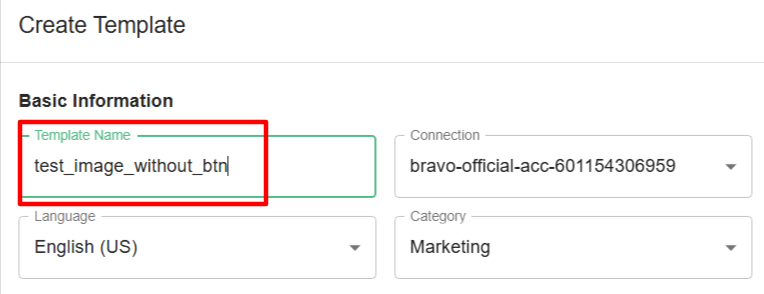
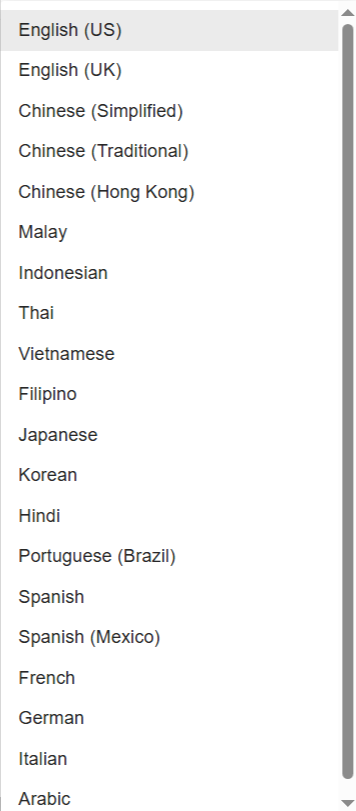
- For the language part you can choose depend on your templates content , if you want to create Malay content then you can select as Malay language
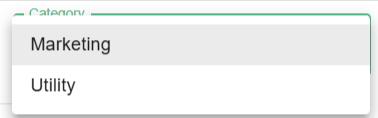
- For the category is depend on you to place your template under Marketing or Utility category
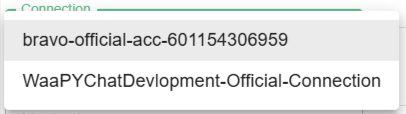
- Choose the connection
Step 3 : Header
- Then , you can add Title and you can attach Image , Video and Documents to be your Header of the template content

Step 4 : Body
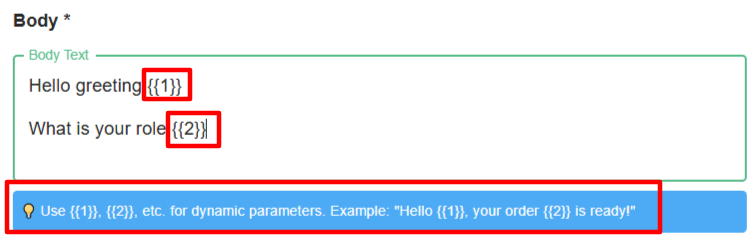
You can use placeholders like {{1}}, {{2}}, etc., to insert dynamic content into your messages. These placeholders will be replaced with actual values when the message is sent.
Example:
"Hello {{1}}, your order {{2}} is ready!"
{{1}}will be replaced with the recipient’s name.{{2}}will be replaced with the order number or any relevant information.
Result:
If
{{1}} = Johnand{{2}} = #12345, the message sent will be:"Hello John, your order #12345 is ready!"
Tips:
- You can use as many dynamic parameters as needed (
{{1}},{{2}},{{3}}, …). - Make sure the correct values are provided for each parameter when sending the message.
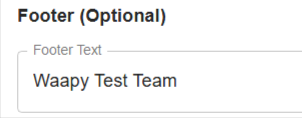
Step 5 : Footer
Step 6 : Button
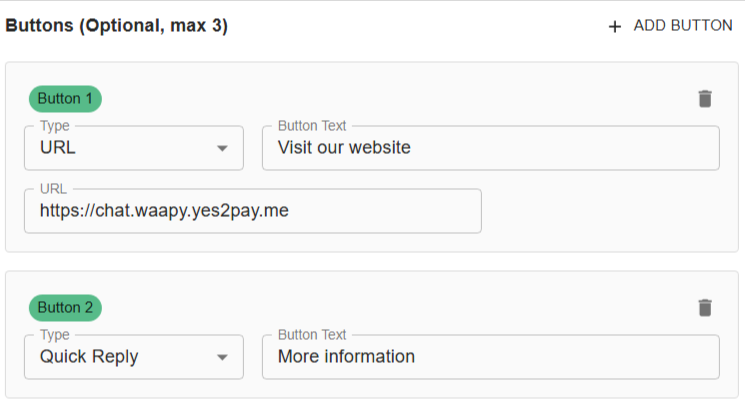
- Make sure the URL is valid and points to an existing website.
- You can name the button anything you like.
Example:
Button name:
"Visit our website"
Action: Opens your website when clicked.
2. Quick Reply Button
You can also add a quick reply button that allows the user to continue the chat with a single tap.
- You can name the button as you like.
- When the user taps it, the predefined message or action is triggered.
Example:
Button name:
"More information"
Action: Sends a quick reply to continue the conversation.
Step 7 : Preview
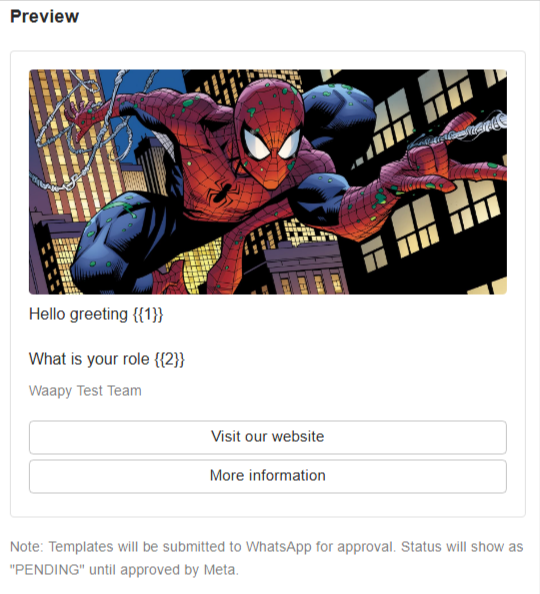
On the right side of the form, you can see a preview of the content template you have entered.
- This allows you to check how your message will look before sending.
- Make sure to review the dynamic parameters, buttons, and text formatting in the preview to ensure everything appears correctly.
Tip:
The preview updates automatically as you make changes to the template, so you can see real-time adjustments
Step 8 : Overview

- After you’ve completed filling out the form, you can click the Create Template button.
- You’ll then need to wait for Meta to approve your template.
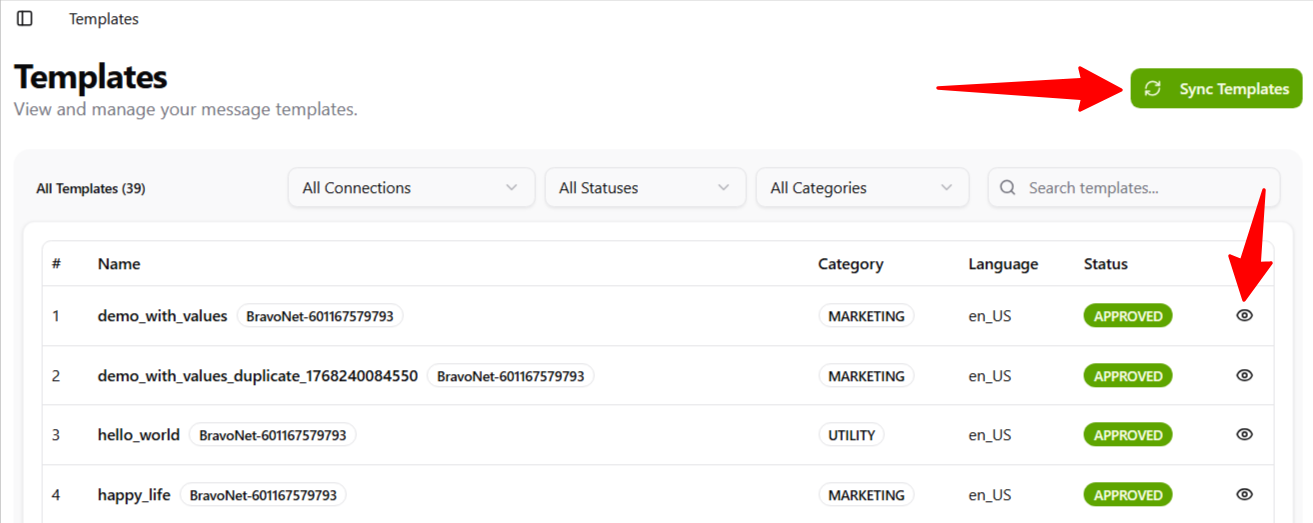
Step 9 : Sync Template
- After you create the template, go to the Template page in Outreach, then click Sync Template to reload the newly approved template. You can also preview the template there